As an Amazon Associate, we earn from qualifying purchases. Some links on this site are affiliate links at no extra cost to you. Our recommendations are based on thorough research and editorial judgment.
Creating a Hygienic Storage System for Clean and Dirty Brushes
Creating a hygienic storage system for our clean and dirty brushes is essential! First, let’s grab separate containers—one for clean brushes and another for dirty ones. We’ll label them clearly (color coding helps too!). Always store dirty brushes upright and rinse them after use to prevent odors. Also, use breathable materials for storage—mold hates air circulation! Keep ’em in dry places, and you’ll enjoy smoother makeup application! Stick with us, and we’ll share more tips!
Key Takeaways
- Designate separate, labeled containers for clean and dirty brushes to prevent cross-contamination and maintain organization.
- Store dirty brushes upright in a ventilated container, ensuring air circulation to minimize odors and bacteria.
- Regularly rinse brushes after use and perform a deep clean weekly with hot, soapy water to maintain hygiene.
- Use breathable storage materials, like mesh bags, to promote air circulation and prevent mold growth.
- Keep brushes in dry, well-ventilated areas, avoiding humid environments to protect handles and extend brush lifespan.
Importance of Proper Brush Storage

Hey there! Have you ever thought about how important proper brush storage really is? I mean, keeping our trusty brushes in great shape isn’t just a nice idea; it’s a must! Picture this: you grab a brush from your cabinet, and instead of a reliable cleaning tool, you find a sticky mess covered in pet hair. Yikes!
To avoid that horror, make it a habit to clean your brushes regularly. After washing them, storing them upright or hanging them is key. This allows them to dry properly and get plenty of air, which cuts down on bacteria and mold. You can even use old mason jars or dedicated brush holders to keep them organized and away from moisture. Just be sure to steer clear of high humidity areas—your brushes will thank you for it! Choosing brushes made from mold-resistant materials can also enhance hygiene and durability.
Once you’ve got your brushes sorted and stored, you’ll notice they perform much better. Plus, it gives you peace of mind knowing they’re ready for action whenever you need them! Speaking of keeping things tidy, let’s talk about maintaining those pesky cleaning tools you might have lying around.
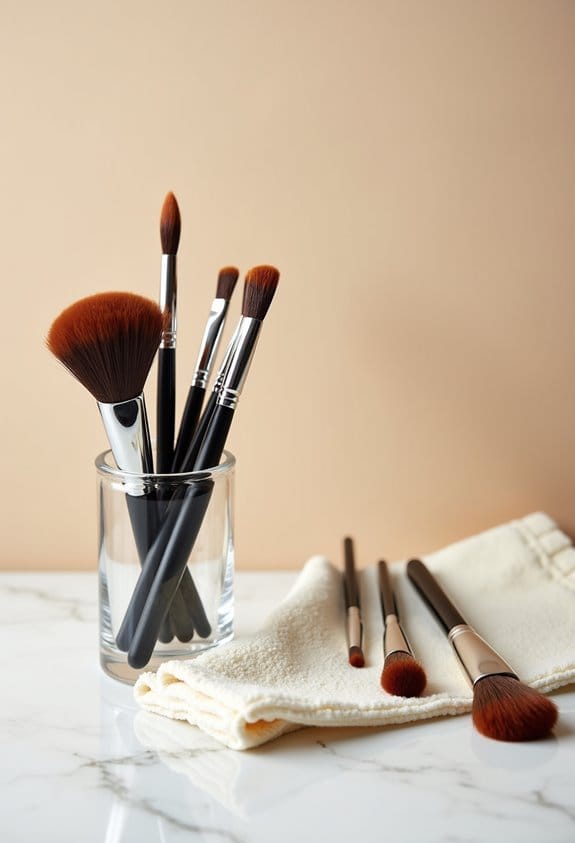
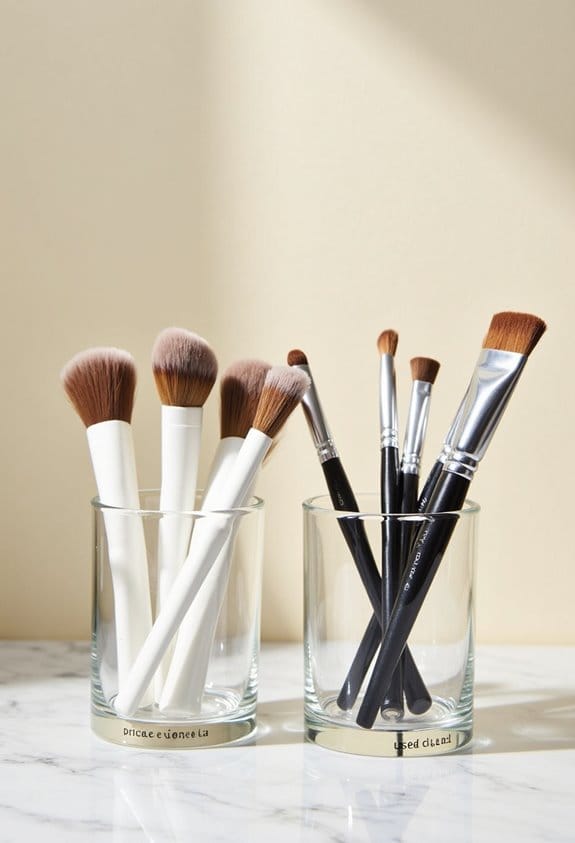
Designating Separate Containers for Clean and Dirty Brushes

You know what’s really a hassle? Reaching for a brush and realizing it’s dirty. That’s why it’s super important to have separate containers for clean and dirty brushes. I’d recommend using clear containers with labels—this way, everyone knows exactly where to put things.
To keep it simple, you might want to use different colors for each container, or add dividers to clearly separate the brushes. For example, if you use a red container for dirty brushes and a green one for clean ones, it’ll be so much easier to spot the difference! Plus, remember to empty and clean the dirty container regularly to keep bacteria at bay.
Let’s also make it a habit to toss used brushes into the dirty container as soon as we’re done with them. This little step can save us from confusion later on. It’s not just about keeping things organized; it’s about ensuring our brushes are ready to go whenever we need them! Regular cleaning prevents makeup buildup and skin irritation, so maintaining clear separation helps promote this essential routine.
Storing Dirty Brushes Upright

Storing dirty brushes upright is a fantastic way to keep them in tip-top shape! When you position your brushes that way, you not only protect their bristles from getting squashed but also improve air circulation. This helps to cut down on mold growth, which is definitely a bonus for maintaining your tools.
A few simple tips can make a world of difference here. First, grab a container specifically for your dirty brushes—something easy to access but with enough space to avoid a mess. You’ll be surprised at how organized it keeps everything! Also, try rinsing your brushes right after you use them. It’s not just about keeping them clean; getting rid of leftover dirt helps make sure your brushes stay hygienic and ready for action next time.
Lastly, be mindful of where you’re storing them. A well-ventilated spot is ideal to keep any unpleasant odors or bacteria at bay. And remember to clean out your storage container every now and then to keep everything fresh. Using silicone mats with textured zones can further enhance brush hygiene by thoroughly removing makeup residue during cleaning. With just a little care, your brushes will stay ready for every project, making your workspace a pleasant place to be!
Using Breathable Materials for Storage
Hey, have you ever felt like some storage options for your brushes are just a bit too stifling? I mean, we’ve all crammed our brushes into those plastic containers and ended up feeling like we’re suffocating the poor bristles! That’s why it’s super important to use breathable materials for storage. When air can circulate, it helps reduce moisture build-up, which is key in preventing mold and bacteria.
Think about using quick-drying fabrics or mesh bags; they’re perfect for keeping your brushes fresh! For example, if you wrap your brushes in a soft fabric pouch or pop them into a mesh bag, it allows them to dry faster after cleaning. Plus, these breathable options make it so much easier to wash them when they need a refresher.
Not only do these ventilated solutions help keep your brushes clean and organized, but they also extend their lifespan. And let’s be honest, nobody wants to use a brush that feels as damp as that old gym sock stuck at the back of the wash! So, if you care for your brushes, consider ditching the plastic and opt for something more breathable. It’s a small change that makes a big difference, don’t you think?
Also, just like with styling tools, using storage options that support regular cleaning and maintenance can greatly boost the longevity and performance of your brushes.
Cleaning and Sanitizing the Storage Area
Hey there! So, keeping our brush storage area clean and sanitized is super important—not just a boring chore! Regularly cleaning helps get rid of pesky germs and bacteria that can hang around in our busy workspace. Think about it: if we’re using those brushes all the time, we definitely don’t want anything gross coming home with them.
It’s a good idea to give the area a solid clean at least once a week. And let’s not forget those tricky corners where dirt loves to hide. A simple spray with a gentle disinfectant or wiping down surfaces with disinfectant wipes does the trick—just make sure to choose products that won’t harm any surfaces! If you ever notice a spill, tackle it right away so it doesn’t turn into a larger mess.
And let’s be real—having organized brushes looks neat and helps keep dust at bay. So, next time we’re cleaning, let’s think of it not just as a task but as a way to keep our brushes happy and ready for action! Speaking of readiness, have you thought about how we can improve our brush care routine? Using tools with advanced heating technology can help reduce product buildup and maintain the brushes’ integrity over time.
Labeling Sections for Organization
Hey there! So, once we get our brush storage area all spiffed up, the next step is keeping things organized. Trust me, labeling is super helpful! By putting labels on sections for clean and dirty brushes, we can easily avoid any mix-ups and keep things hygienic. After all, we definitely don’t want a dirty brush sneaking into our clean stash!
For the labels, using waterproof options or markers can make a big difference. Just imagine—one section clearly marked “Clean Brushes” and another labeled “Dirty Brushes.” If you’re in a busy studio, you could even go a step further and use color-coded labels to quickly spot where each type of brush belongs. For instance, maybe you use green for clean and red for dirty. It just makes everything a lot clearer!
And here’s a little tip: make it a regular habit to check and update your labels, so they stay fresh and accurate. A well-organized space means you can grab your tools quickly and keep your hygiene standards top-notch. Plus, it just feels good to know everything’s in its right place! Now, let’s talk about what to do with those brushes after we’ve used them.
Remember, regular cleaning helps prevent bacterial buildup and prolongs brush lifespan, so keeping your brushes clearly sorted is the first step to maintaining both hygiene and performance.
Regular Maintenance of Brushes
You know how important regular maintenance of brushes is, right? It’s kind of like giving them a much-deserved spa day! After all the hard work they do, they need some TLC. The first step? Rinse and air-dry your brushes right after you use them. This quick action keeps mold and bacteria at bay, which is a total win!
Once a week, treat those bristles to a nice deep clean with hot, soapy water. If you really want to go the extra mile, try a vinegar rinse—it can work wonders in keeping your brushes fresh! Just mix equal parts of vinegar and water, soak your brushes for a few minutes, and then rinse them out thoroughly.
Now, let’s talk storage. It’s best to keep your brushes upright or hang them; this way, they have good air circulation and dry properly. Plus, rotating your brushes every now and then helps keep them in great shape and actually saves you money on replacements! Using a brush cleaning tool can also save time and reduce wrist strain during cleaning. So, by pampering your tools with regular maintenance, you’ll get better results with your work, and your brushes will last longer. What’s next? Maybe we can explore how to choose the right brushes for your needs!
Air Circulation to Prevent Mold
Hey there! You know how important air circulation is to prevent mold, right? Well, using holders that have ventilation holes really helps keep the airflow going, which keeps your brushes fresh. And let’s be real—mold absolutely loves those damp spots, so try to steer clear of high humidity areas like sinks or bathrooms.
Before storing your brushes, give them a good wash with hot, soapy water. This cleans off any dirt and cuts down on mold sources. Don’t forget to take a quick peek at your brushes every now and then for signs of dampness; a simple check can save you a headache later!
Keeping those brushes happy and mold-free is key—nobody wants a furry paintbrush in their workspace! Speaking of maintaining your tools, let’s talk about storage options that can help keep everything in tip-top shape. Choosing organizers made from easy-to-clean materials like acrylic or ABS plastic can simplify maintenance and improve hygiene.
Utilizing Magnetic Strips for Accessibility
Have you ever found yourself digging through drawers just searching for that one brush? I can totally relate! That’s where magnetic strips come in. By installing these handy strips on your wall, you can keep your brushes neatly upright and easily visible, which means no more endless searching. It also makes it super easy to separate your clean brushes from the dirty ones—ideal for saving space in those cluttered drawers!
When picking out magnets, make sure to choose non-scratching options. This way, you’ll protect the delicate bristles on your brushes. A little tip: try to hang your magnetic strip near the sink. That way, you’ll have a place to let your brushes dry after washing them. If you’re worried about them falling off, adding clips or hooks can help secure them in place. Maintaining a hygienic storage system is essential for preserving brush longevity and ensuring effective lymphatic drainage during use.
Implementing Slim Storage Solutions
Hey there! You know how it goes—when it comes to storing brushes, space can get a bit cramped, especially if you’re working with a small area. That’s where slim storage solutions come into play! For instance, have you tried using telescopic brushes? They’re super handy because you can collapse them down to save space and easily extend them when you’re ready to use them. Plus, hanging them on a tiny hook or clip means they’re always within arm’s reach.
Another neat option is a magnetic wall strip. Picture hanging your brushes right next to the sink; it’s not only functional but it also keeps your drawers nice and tidy! And let’s not overlook pocket organizers. You can mount these on the inside of your cabinet doors, turning those often-forgotten spaces into smart storage spots. Keeping your brushes organized like this really makes a difference in how clutter-free your space feels. Choosing organizers made from durable acrylic materials ensures easy cleaning and lasting clarity, contributing to a hygienic and stylish storage system.
Keeping Brushes in Dry Environments
Hey! So, let’s chat about keeping brushes in dry environments and why it really matters. You might not realize it, but the way we store our brushes can extend their life. If you keep them in a dry place, it helps to prevent mold and bacteria from sneaking in—those buggers thrive in damp spots!
Think about it this way: if you stash your brushes in a steamy bathroom or near a sink, the humidity can cause serious damage, especially to wooden handles that can warp or crack over time. Instead, try keeping them in a cool, dry area, like a drawer or a makeup bag. Just make sure that spot is ventilated, too!
Keeping that moisture away will make a big difference in how long your brushes last. Plus, your makeup application will be way smoother without any unwanted gunk on those bristles! It’s all about giving your tools the best care they deserve. Next up, let’s talk about the best ways to clean and maintain your brushes to keep them in top shape.
The Benefits of Organized Brush Storage
You know how we always end up with our brushes getting all dirty or mixed up? When we have our brushes organized in storage, we actually stop dirt and germs from getting cozy together. It’s a pretty simple concept, but it really matters. For instance, if you keep your makeup brushes in a holder that separates them, you can easily grab the one you need without worrying about all that mess.
Not to mention, taking care of your brushes by storing them properly helps them last longer. Think about it—when your brushes are in good shape, you won’t need to replace them as often, which is a nice little win for your wallet! Plus, a tidy setup means you can find that perfect brush in no time, boosting your productivity when you’re getting ready in the morning.
Frequently Asked Questions
What Is the Most Hygienic Way to Store Makeup Brushes?
To store makeup brushes hygienically, we should keep clean brushes upright in a ventilated holder while using a separate container for dirty ones. Regular brush maintenance guarantees freshness, preventing bacteria growth and extending their lifespan.
How to Store Brushes After Cleaning?
After cleaning, let’s cradle our brushes like precious jewels, storing them upright in a ventilated holder. We’ll guarantee they’re completely dry, protecting their delicate forms and promoting their longevity through attentive brush care.
What Is a More Hygienic Alternative to a Toilet Brush?
We believe sanitary alternatives like toilet wands with disposable pads offer a cleaner, more hygienic solution compared to traditional brushes. They minimize cross-contamination and make toilet cleaning easier and more effective for everyone.
How Can I Store a Toilet Brush Hygienically?
We can store a toilet brush hygienically by using a holder with ventilation holes, ensuring it stands upright. Additionally, maintaining bathroom organization with regular cleanings helps keep the entire area fresh and bacteria-free.