As an Amazon Associate, we earn from qualifying purchases. Some links on this site are affiliate links at no extra cost to you. Our recommendations are based on thorough research and editorial judgment.

Every Eye Brush You Actually Need in Your Kit (and How to Use Them)
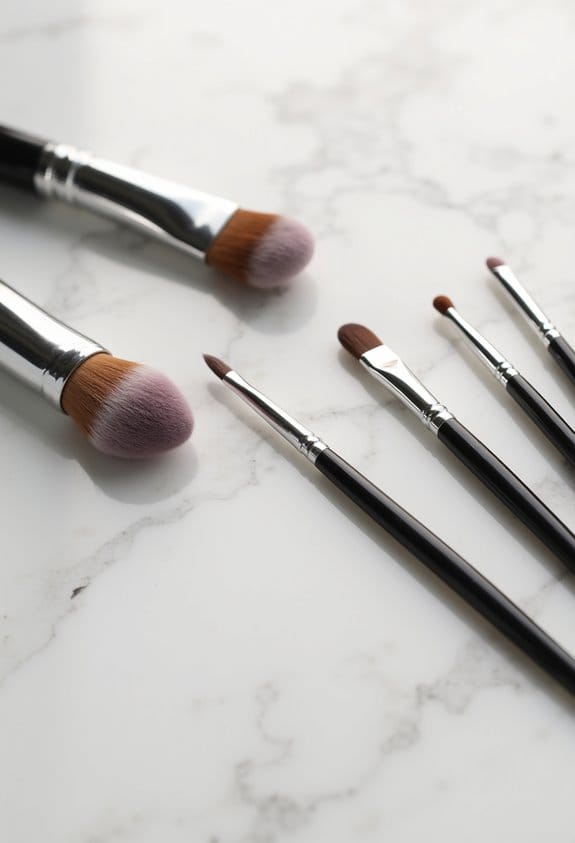
When it comes to eye brushes, we need a solid kit for all our creative looks! Here’s what we’re talking about: a *Flat Shader Brush* for packing on eyeshadow, a *Fluffy Blending Brush* for smooth blends, and a *Crease Brush* for those precise lines. Add in a *Pencil Brush* for details, and an *Angled Brush* for sharp eyeliner and brows. Trust us, having these essentials will make you feel like a pro! And if you want to master some fun techniques, just stick with us!
Key Takeaways
- A flat shader brush is essential for applying eyeshadow evenly and eliminating fallout, perfect for highlighting brow bones and inner corners.
- Fluffy blending and shadow brushes allow for smooth blending of mid-tone shades, ensuring a seamless finish without harsh lines.
- Use a crease brush for precise application in the crease, adding depth to your look, while a pencil brush enables detailed eyeshadow designs.
- An angled brush helps create sharp eyeliner and defined brows, while frequent cleaning maintains the brush shape and efficiency.
- A fan brush is versatile for highlighting, blending blush, and achieving a natural look, making it a must-have in your kit.
The Flat Shader Brush

Let’s talk about the flat shader brush! This little tool is a must-have in any makeup kit, especially when it comes to applying eyeshadow. Its dense bristles are perfect for grabbing pigment and applying color evenly on the eyelids, which means you get that nice, bold look without having to layer on tons of product. Whether you’re using cream or powder shadows, it’s your best friend for a smooth application.
One of the best parts? It also helps eliminate fallout, so you won’t need to spend forever cleaning up those pesky little specks under your eyes. Plus, if you’re looking to highlight, this brush makes it super easy to apply a bit of highlighter to your brow bone or the inner corners of your eyes. That little touch can add such a beautiful brightness to your makeup look!
For the best results, consider pairing your brush with a low-absorption makeup sponge to blend and enhance your eye makeup seamlessly.
Fluffy Blending Brush

Hey there! Let me tell you about the fluffy blending brush—it’s honestly like having a best friend in your makeup routine. With its soft bristles and large, dome-shaped head, this brush makes blending eyeshadow so much easier. It’s fantastic for those mid-tone shades that add depth, giving you that flawless, blended look without any harsh lines.
You can use it with both powder and cream eyeshadows, which is super handy. For instance, if you’re applying a transition shade in your crease, this brush helps to feather it out effortlessly so everything looks soft and seamless. Just remember to clean your brush regularly to keep it fresh and hygienic. A dirty brush can mess up your whole look! Keeping tools clean is essential, similar to maintaining facial exfoliating brushes to ensure hygiene and longevity.
Crease Brush

Hey friend! If you’re really into eye makeup, let me tell you why a crease brush should totally be part of your toolkit. It’s like having a little magic wand that lets you apply deeper shades right into the crease of your eyelid. This adds some great depth and dimension to your look.
One of the best things about a crease brush is its tapered design. With those soft bristles, you can easily blend without any harsh lines—who likes those? Unlike regular blending brushes that are wider, crease brushes are narrower, so they help you get super precise with your placement. For example, if you’re going for a smokey eye, a crease brush can help you layer that dark shadow just where you need it.
Make sure to keep your crease brush clean—it helps maintain its shape and keeps product buildup at bay. So whether you’re using it with cream eyeshadow or powder, you’ll find it becomes a trusty sidekick in creating those stunning eye looks you love. Trust me, you’ll wonder how you ever lived without one! Now, let’s chat about the best techniques for using it.
Regular cleaning with gentle soap and air drying flat helps your brush retain its softness and shape, ensuring precise application every time with proper maintenance.
Pencil Brush
Hey there! You know how some makeup brushes can feel a little floppy? Well, the firmer bristles of a pencil brush actually give us the control we need for those well-defined looks. They’re perfect for getting into the crease of your eye, allowing you to create detailed eyeshadow designs like a pro. Just think about how satisfying it is to blend a smoky eye or sharpen that winged liner with precision!
But here’s the thing: taking care of your brushes is super important! If we let product buildup happen, not only can it affect the performance, but it can also mess with our hygiene. So, after using your pencil brush, try giving it a quick clean with some gentle brush cleanser or even a mild shampoo. Rinse it thoroughly and reshape it before letting it dry. Trust me, pampering your brushes will keep them working their best and help them last longer! Now, speaking of makeup tools, let’s chat about how to pair your brushes with the right eyeshadows for that perfect look. For best results, consider using brushes with synthetic bristles to ensure smooth application and easier cleaning.
Angled Brush
Hey there! Let’s chat about the angled brush— it’s like that reliable friend who’s always got your back when you’re doing your makeup! This brush is super handy for getting those sharp lines you want, whether it’s along your lash line or filling in your eyebrows. The slanted bristles make it easy to create a flawless winged eyeliner look or a perfect cat-eye, which is always fun for a night out, right?
One of the best parts about the angled brush is its tapered edge. It gives you control over where the product goes, which can really help when you’re working to fill in sparse areas of your brows. Just a few strokes can enhance your brows for that neat, polished vibe.
Oh, and don’t forget to keep your brushes clean! If you’re using gel or cream products, they can build up quickly. A simple wash with soap every now and then can extend the life of your angled brush, so it’s always ready when you are. Remember, regular cleaning prevents product buildup and shedding, ensuring your brush performs at its best.
Speaking of brushes, have you thought about which ones to use for blending? Let’s explore that next!
The Dome Brush
Hey there! So, have you ever tried using a dome brush for your eyeshadow? It’s amazing how just using gentle circular motions with this brush can give you a stunning gradient effect, whether you’re working with matte or shimmer shadows. Trust me, it makes blending so much easier! For example, when you apply a dark shade at the outer corner and then a lighter shade near the inner corner, using that dome brush to blend them together creates a seamless look.
And let’s be honest—no one wants harsh lines on their eyes, right? With the dome brush in hand, you’ll feel like a makeup artist, and you don’t have to break the bank to do it. Just remember, a little bit of patience and practice goes a long way when it comes to blending. High-quality dome brushes often feature dual-density bristles, which help achieve smooth and precise blending.
So, grab your dome brush, and let’s make those eyes pop! Ready to keep chatting about brushes?
The Shader Brush
Hey there! If you’ve ever wanted to pack on color like a pro, let me tell you about the shader brush! This little gem has flat bristles that make it perfect for applying eyeshadow and achieving that stunning, dramatic look we all adore. When you’re applying eyeshadow, try using a gentle tapping motion instead of swiping. It not only keeps fallout to a minimum, but it also makes sure that maximum pigment grips onto your eyelids—nobody wants a messy shadow situation, right?
Shader brushes come in different sizes, which is super handy! For instance, if you want to highlight the inner corners of your eyes, a smaller shader brush will do wonders. On the other hand, if you’re looking to cover your lids quickly, grab a larger one. Just don’t forget to clean them regularly! Buildup can mess with both how the brush performs and your hygiene. Keeping your shader brushes fresh ensures that every eyeshadow application turns out fabulous!
Speaking of fabulous looks, let’s chat about blending next—because that’s where the magic really happens! Choosing brushes with synthetic bristles can also help with easier cleaning and better makeup application.
The Fan Brush
You know, when we talk about makeup brushes, we often think each one has its own special job, but let me tell you about the fan brush—it’s an absolute multitasker! With those soft bristles that spread out like a little hand, this tool makes highlighting super easy. Want to accent your cheekbones or get that lovely glow on your brow bones? Just a gentle tap with the fan brush does the trick, giving you just the right amount of shimmer without turning you into a walking disco ball—unless that’s the vibe you’re going for, of course!
And here’s another cool thing: the fan brush is fantastic for applying blush too. Instead of that heavy, streaky look, you can build up soft layers for a natural flush that looks effortless. It’s also great for blending different colors together to create that pretty, seamless look. Who knew a single brush could cover so much ground, right? Plus, many fan brushes come in both synthetic and natural bristles, offering options suitable for sensitive skin and personal preferences.
The Fluffy Shadow Brush
Hey there! Let’s talk about one of my favorite tools in the makeup kit: the fluffy shadow brush. This brush is such a game-changer for applying base eyeshadow colors. With its big, rounded head, you can quickly sweep on color and get an even finish every time. For example, if you’re using a soft beige as a base, it picks it up perfectly and lays it down smoothly.
Now, the bristles are super soft, making blending a breeze. You won’t have to worry about those awkward harsh lines anymore! Whether you’re working with cream shadows or powder ones, this brush adapts and picks up just the right amount of product for a soft wash of color.
Also, it shines when it comes to layering colors. If you’re going for a bold look, start with a lighter shade and build up the intensity gradually with darker shades. Just remember to clean your fluffy shadow brush regularly to keep it performing at its best! Taking care of it will really enhance your eyeshadow application every single time. To maintain its softness and effectiveness, consider using tools made with washable materials that allow for easy cleaning and durability.
Techniques for a Natural Look
Hey there! Let’s chat about how to create a gorgeous, natural eye look without any fuss. Start by grabbing your favorite fluffy shadow brush; we’ll use it to apply a neutral base color all over your eyelid—think of this as laying down a clean canvas for your masterpiece. After that, take a crease brush and gently blend a shade that’s a bit darker into your crease. This step is key for adding depth, so it’ll create that lovely soft gradient effect we’re going for.
Now here’s a little insider tip: use a detail brush to add a touch of light shimmer in the inner corners of your eyes and just below your brow bone. This will really brighten up your look! To finish defining your eyes without going overboard, grab a pencil brush and softly smudge a nice brown shadow along your lower lash line. It helps draw attention without it looking too heavy. Finally, pop on some lengthening mascara, and there you have it—a simple yet stunning natural look!
Using quality brushes with the right density and firmness can make blending easier and enhance the overall finish.
Now that we’ve nailed the eyes, let’s consider a soft lip color that complements this eye makeup, shall we?
Creating a Smoky Eye
Hey there! If you’re looking to elevate your eye makeup with a stunning smoky eye, I’m here to guide you step by step. Start by grabbing a flat shader brush and pick a dark shade—think deep charcoal or rich plum. Sweep that all over your eyelid to create a bold base that sets the stage for the rest of your look.
Next, take a crease brush and dip it into a medium-toned shadow, like a warm taupe or soft brown. Gently blend this into your crease; it adds depth and really helps soften the edges without making everything too harsh. Then, reach for a fluffy blending brush to seamlessly work out any stark lines—this part is key for that dreamy, blended effect.
Now, let’s move on to your lower lash line. Use a pencil brush to smudge some of that dark shade down there and connect it to your upper lid. This not only enhances the smoky effect but also gives your eyes a sultry appearance. Finish off with a small angled brush to apply black or dark brown eyeliner. Go ahead and smudge it a little for extra drama!
Once you get the hang of this technique, you’ll be ready to experiment with different colors and styles. A smoky eye can work for any occasion, whether it’s a casual outing or a night on the town. Now, let’s talk about how to pair this look with the perfect lip color!
Mastering the Cut-Crease Technique
Hey there! So, when it comes to mastering the cut-crease technique, blending is key. It’s all about creating that seamless transition between colors, right? Think of it as painting a beautiful sunset where one shade gently fades into another.
To really nail this technique, start with a good base. Apply a primer on your eyelids to help the eyeshadow stick and pop. Then, use a fluffy blending brush to soften the edges of your cut crease, which can make a huge difference. For example, after you’ve defined the cut crease with a contrasting color, take a lighter shade and blend it outwards to soften that harsh line.
It’s really satisfying to see the smooth blend come together, and it truly can elevate your eye makeup game. So, let’s explore the tools you’ll need next to perfect that cut-crease look!
Frequently Asked Questions
How Often Should I Clean My Eye Brushes?
We should clean our eye brushes at least once a week to maintain brush sanitization, prevent breakouts, and guarantee effective cleaning. Regular maintenance prolongs tool longevity and promotes eye health, especially when traveling.
What Material Is Best for Eye Brush Bristles?
While synthetic bristles offer durability and cruelty-free options, natural fibers enhance blendability and color payoff. It’s essential for us to contemplate brush fiber types, application techniques, price range variations, and maintenance tips when choosing eye brushes.
Can I Use Face Brushes for Eye Makeup?
Yes, we can use face brushes for eye makeup, but let’s consider brush differences and application techniques. Face versatility helps, yet we must ascertain product compatibility to achieve desired blending styles and avoid mistakes.
How Do I Store My Eye Brushes Properly?
To store our eye brushes properly, let’s explore brush storage solutions like vertical holders, magnetic organizers, or aesthetic mason jars. Travel-friendly options and compartmentalized drawers keep them safe and organized for ultimate makeup magic!
When Should I Replace My Eye Brushes?
We should replace our eye brushes when we notice signs of wear, like bristle shedding or uneven application. Experts recommend every 6-12 months, but personal preference and hygiene practices also play a key role in longevity.