As an Amazon Associate, we earn from qualifying purchases. Some links on this site are affiliate links at no extra cost to you. Our recommendations are based on thorough research and editorial judgment.
How to Create a Smokey Eye Using Only Three Brushes
Creating a smokey eye with just three brushes? Absolutely doable! Start with the Pro Medium Shadow Brush to apply your dark shade on the outer corners. Then, use the Tapered Shadow Blending Brush to blend those colors seamlessly—think soft circular motions! Finally, grab an All Over Shadow Brush for your highlight. Remember, building color gradually is key to avoiding harsh lines. Want to know some pro tips for that long-lasting look? Keep on discovering!
Key Takeaways
- Use the Pro Medium Shadow Brush to apply a dark shade to the outer corner and blend for a smoky effect.
- Apply a mid-tone shade in the crease with the Pro Crease Blender Brush, ensuring smooth transitions and soft edges.
- Utilize the All Over Shadow Brush to apply a lighter shade on the eyelid and highlight the brow bone for dimension.
- Always start with a light hand and gradually build color intensity, focusing on blending for a polished look.
- Finish with a smudge of dark pencil liner along the lower lash line for added depth, ensuring a sultry finish.
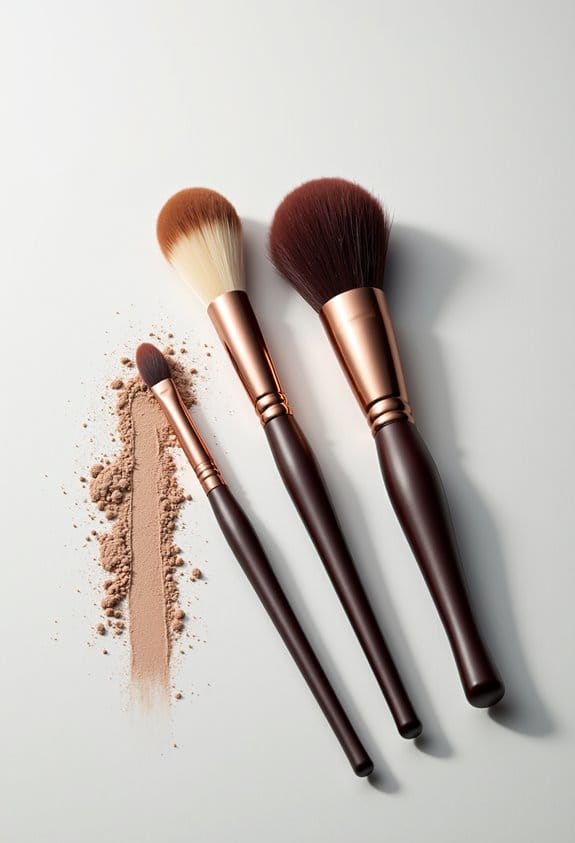
Essential Tools for Smokey Eyes
Hey there! So, if you’re looking to master the art of the perfect smokey eye, let me share some essential tools that will really make a difference. Trust me, it’s simpler than you might think, especially when you have the right brushes on hand.
First up is the Pro Medium Shadow Brush. It’s fantastic for applying color not just to your eyelids, but also underneath your lash line. Picture this: you sweep a soft, dark shadow across your eyelid and then gently tap it along your lower lashes. It creates that sultry look we all admire!
Now, don’t forget about the Pro Crease Blender Brush. This tool is key for blending your shadows seamlessly, so you don’t end up with any of those harsh lines that can feel a bit jarring. Simply use it in a circular motion in your crease to soften the edges—it’s like magic!
Lastly, the All Over Shadow Brush is a must-have for applying color washes and bringing your brow bone to life with a highlight. A little bit of a light shade there can really make your eyes pop!
Using brushes with ultra-soft synthetic bristles ensures smooth application and prevents irritation, which is perfect for delicate eye areas.
Understanding the Pro Medium Shadow Brush

If you want to master that smokey eye look, you really need to check out the Pro Medium Shadow Brush. This brush is a total gem for applying eyeshadow right onto your eyelids, and it even works wonders underneath your eyes for a cohesive look.
Its size is perfect for multiple applications. For example, you can easily use it to smudge your pencil liner for a softer vibe or to blend out your eyeliner for a dreamy effect. It’s all about creating that depth and intensity that makes a smokey eye truly pop!
Makeup artists love this brush—and it’s easy to see why. With the Pro Medium Shadow Brush in hand, you’ll feel like a pro when it comes to your eye makeup. Now, let’s talk about the different eyeshadow techniques you can use to really enhance your look!
For best results, remember to clean your brush regularly to prevent product buildup and maintain brush performance.
How to Use the Pro Medium Shadow Brush

Alright, let’s talk about how to use the Pro Medium Shadow Brush! This brush is really versatile, and it’s fantastic for applying color right on your eyelid or even underneath your eyes. If you’re aiming for that classic smokey eye look, this tool can help you achieve it effortlessly.
To start using your Pro Medium Shadow Brush, load it up with some shadow and gently press it onto your lid. As you apply, remember to blend—this helps to create a smooth transition of colors. For example, if you’re using a dark shade on the outer corner, you can use the brush to blend it softly into a lighter shade on the inner corner. This technique really helps to eliminate any harsh lines.
Another great use for this brush is to smudge your eyeliner. Instead of using just your fingers, you can utilize the brush to soften those edges for that dreamy, blended look. Just keep in mind to clean your brush regularly so you won’t accidentally transfer unwanted colors during your next makeup session. Choosing brushes with synthetic bristles can also help ensure a gentle and smooth application that minimizes skin irritation.
The Importance of the Tapered Shadow Blending Brush
Hey there! Let me tell you why the tapered shadow blending brush is such a must-have for anyone who loves makeup. This brush is super handy for perfecting that smokey eye look. Its tapered shape fits right into the crease of your eyelid, making it easy to apply colors precisely while blending them seamlessly. Those fluffy bristles work wonders for softening any harsh lines, giving you that beautifully blended finish.
But that’s not all! You can also use this brush to sweep a light color from your lash line all the way up to your brow bone, which can really add some depth and dimension to your eye makeup. Just remember, keeping it clean is essential—if you forget, you might end up mixing dark pigments with lighter shades, and nobody wants that! So, make sure to wash your brushes regularly to keep them performing their best.
Choosing a brush with vegan synthetic bristles can enhance the blending experience while also being cruelty-free.
Now that we’ve covered the essentials of the tapered shadow blending brush, let’s chat about how to choose the right eyeshadow shades to complement your look!
Techniques With the Tapered Shadow Blending Brush
Hey there! Let’s talk about achieving that perfect smokey eye because honestly, nothing beats that sultry look. Using a tapered shadow blending brush is essential for this technique. Its pointed tip makes blending into the crease of your eye a total breeze, allowing you to effortlessly work in a darker shade in the outer corners.
When you’re blending, go for a light touch and use circular motions with the brush. This simple technique helps you mix the colors seamlessly and keeps those dreaded harsh lines at bay. For example, if you’re using a charcoal shade, lightly build up the color while blending it out with a softer taupe. And don’t forget—I always clean my brush before switching from eyeshadow to concealer. It keeps everything looking fresh and polished!
That same tapered brush can also work wonders for your lower lash line, giving it that smudged, sultry effect. Using brushes made with non-absorbent bristles can simplify cleaning and maintain makeup precision. So, with these tips in your back pocket, you’ll be blending like a pro in no time! Ready to tackle the rest of your makeup routine? Let’s go!
Mastering the Shadow Blending Brush
Hey there! If you’re looking to nail that flawless smokey eye look, mastering the shadow blending brush is super important. This tapered brush is perfect for getting into the crease of your eye, which means you can apply and blend your eyeshadow with precision. Trust me, whether you’re just starting out or you’ve been doing your makeup for a while, this brush is one of your best friends for dreamy smokey eyes!
Now, here’s a little tip: always keep your brushes clean. Regular cleaning is essential because it helps prevent unwanted color transfer between shades. For instance, if you go from a deep black to a lighter shade without cleaning your brush, the darker pigment can mess up your look. So, take a moment to clean your blending brush between applications to make sure your lighter shades stay vibrant and true.
And don’t worry if you’re unsure about which brush to choose—there are so many options out there! You can find everything from fluffy brushes that create soft blends to vegan options if you prefer that. Each type can help you achieve different blending techniques, making it easy to find what works best for your makeup style. Ready to explore some fun eyeshadow colors next?
Choosing a brush with synthetic fibers can enhance your blending experience by providing durability and easier cleaning.
Blending Techniques for a Flawless Finish
Alright, let’s chat about that gorgeous smokey eye! Blending is super important for achieving a polished look. Start off with a tapered blending brush; it’s really effective for getting those shadows precisely into the crease of your eyelid. The goal here is to create a soft gradient, so we want to avoid any harsh lines. Try using small, circular motions—it makes a huge difference in blending those colors smoothly!
Begin with a lighter shade as your base, then work your way up to darker shades. As you apply each color, make sure to blend it well before moving on; this helps create a seamless transition. And here’s a handy tip: regularly clean your blending brush so that colors don’t mix in ways you don’t want!
Once you feel good about your base, grab a Pro Crease Blender Brush to add some depth. Use it to softly diffuse those darker shades into the outer corners of your eyes. You’ll see how it elevates your whole look! Keep in mind that practice makes perfect, and soon you’ll be blending like a pro. Now, let’s talk about how to choose the right colors for your smokey eye. For best results, consider using synthetic brushes as they excel in blending cream and powder products seamlessly.
Choosing the Right Eyeshadow Colors
Alright, so let’s talk about transition shades! They’re super important because they help create that smooth blend between different eyeshadow colors, eliminating any harsh lines. Think of them as the bridge between your main shades; for example, if you’re working with a deep brown in the crease, a soft beige or peach can work wonders to transition smoothly towards your brow bone.
And here’s a fun tip: adding a touch of shimmer or metallic shades on your eyelid can really amp up the smokey effect! Using a gold or bronze shimmer, for instance, right in the center of your lid can make your eyes pop. Plus, don’t shy away from experimenting with colors that flatter your eye color. If you have green eyes, purples and taupes can look stunning for a unique smokey eye look that will definitely catch people’s attention.
Now that we’ve got the basics down, let’s explore how to pick the right eyeshadow colors that really enhance your eye shape and color. Using the right blending eyeshadow brushes can make all the difference in achieving a seamless and professional finish.
Tips for Achieving Depth and Definition
Alright, let’s talk about how to create that perfect smokey eye! To really nail the depth and definition, we need to start with the outer corner of our eyes. Grab your Pro Medium Shadow Brush and pick up a dark shade—this is your secret weapon for building that intensity. Start by placing it in the outer corner and gently blend it toward the center. It’s all about layering, so take your time and go back as needed to achieve that rich, smoky vibe.
Next up, let’s add some dimension in the crease. Use your Pro Crease Blender Brush for this one. Sweep a medium-toned shadow into the crease to carve out your eye shape and soften any harsh lines. Trust me, this is key for that beautiful gradient effect we’re after!
And we can’t forget about brightness! Pop a lighter shade on the inner corners and along the brow bone to highlight those areas—it makes such a difference. For an extra sultry vibe, smudge a dark pencil liner along your lower lash line. Also, don’t skip the brush cleaning between shades; it will keep your look clean and defined.
Once you’ve got your smokey eye down, you’ll see how each step comes together beautifully. Ready to add some finishing touches or maybe choose a lip color that complements this look? Let’s keep going!
To keep your hair neatly out of your face during application, consider using a non-slip spa headband for a comfortable and secure fit.
Common Mistakes to Avoid When Creating Smokey Eyes
Creating that sultry smokey eye can feel a little overwhelming, but trust me, it doesn’t have to be! One of the biggest mistakes people make is using too much product right off the bat. Instead of piling on the eyeshadow, start with a lighter hand. This not only helps you keep your look soft and blended, but it also gives you more control over the intensity.
Now, let’s talk about blending—it’s super important! If you skip this step, you might end up with harsh lines that totally wreck that dreamy effect we’re going for. A good tip is to use a clean blending brush to soften the edges. And don’t forget to apply a primer first! It helps keep your eyeshadow in place and prevents any creasing or fading.
Also, make sure you’re using the right brushes. For example, a fluffy brush works wonders for blending, while a smaller, denser brush is great for packing on color. Without the right tools, your smokey eye may not reach its full potential. Just remember, building up color gradually is key for that balanced finish. So, take your time—it really pays off!
Using brushes with ergonomic handles can improve your control and comfort during application, making your smokey eye look even more precise.
Once you’ve nailed the smokey eye, we can explore ways to enhance your overall look with the perfect lip or blush to complement it.
Pro Makeup Tips for Long-Lasting Results
Let’s talk about waterproof eyeliner and mascara—they’re absolute lifesavers when it comes to keeping your makeup smudge-free all day! You know those moments when you look in the mirror, and horror sets in because your eyeliner has decided to migrate? That’s where these products come in handy. For instance, using a gel waterproof eyeliner can help you achieve those sharp cat-eye looks without worrying about sliding off by midday.
And don’t forget about a good setting spray! Spritz some on at the end of your makeup routine, and it locks everything in place, even through a long day at work or a night out with friends. Picture this: you finish your look, give it a quick mist, and you’re set for hours. It’s really that straightforward!
Final Touches to Enhance Your Smokey Eye Look
So, once you’ve got that perfect base for your smokey eye, it’s all about those final touches that really amp up the look! Think of it as adding the icing on a cake. First off, let’s reach for our Pro Medium Shadow Brush. Use it to apply a smudgy line of eyeliner along your lower lash line—it’s such an easy way to get that sultry vibe we all love.
After that, grab your Pro Crease Blender Brush. This is where the magic happens! Add a darker shadow in your crease and blend it out to eliminate any harsh lines. Remember, a soft, smoky transition is key here.
Don’t skip the highlighting part! A bit of shimmer in the inner corners and on your brow bone will really brighten up your eyes. To finish everything off, layer on some volumizing mascara. It opens up your eyes and pulls the whole look together beautifully.
These final steps are what really make your smokey eye pop! Now, let’s chat about how to keep that look intact all day long.
Frequently Asked Questions
How to Do an Easy Smokey Eye for Beginners?
Did you know 74% of beginners struggle with eyeshadow application techniques? To create an easy smokey eye, we should choose colors wisely, blend well, and finish with mascara, avoiding common makeup mistakes for that perfect look.
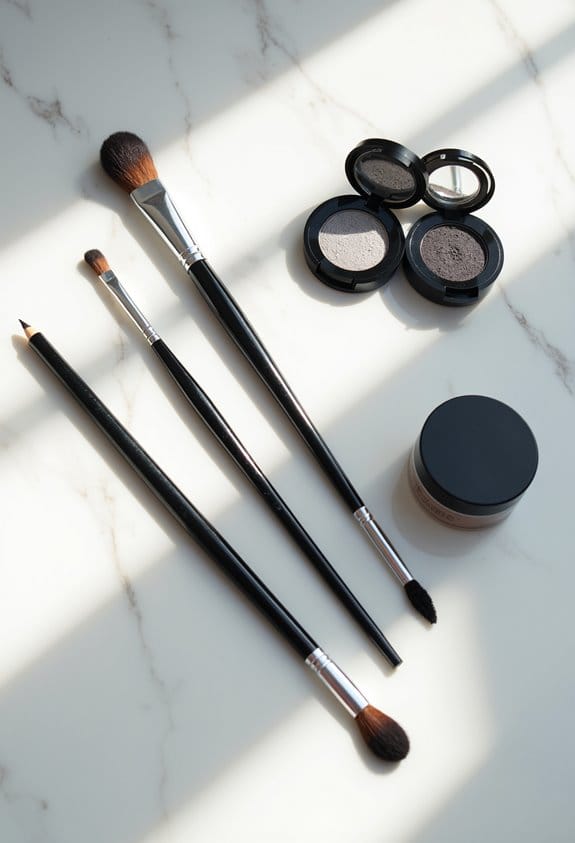
What Brushes Do I Need for a Smokey Eye?
For a smokey eye, we need essential brushes: a medium shadow brush for eyeshadow placement, a crease blender for blending techniques, and an all-over shadow brush. Quality matters, so let’s choose between synthetic and natural options wisely!
How to Apply Eyeshadow in 3 Steps?
To apply eyeshadow in three steps, let’s focus on brush selection. Start by layering colors for depth, emphasize blending techniques for seamless shift, and adjust intensity as needed—no worries, we’ll avoid common blending mistakes together!
What Is the Smokey Eye Rule?
The smokey eye rule involves mastering eye shadow blending with complementary color combinations while considering our eye shape. We should avoid common mistakes, ensuring perfecting the look for evening versus daytime variations with pencil versus powder techniques.


