As an Amazon Associate, we earn from qualifying purchases. Some links on this site are affiliate links at no extra cost to you. Our recommendations are based on thorough research and editorial judgment.

Blending Brushes Vs Shader Brushes: When to Use Each
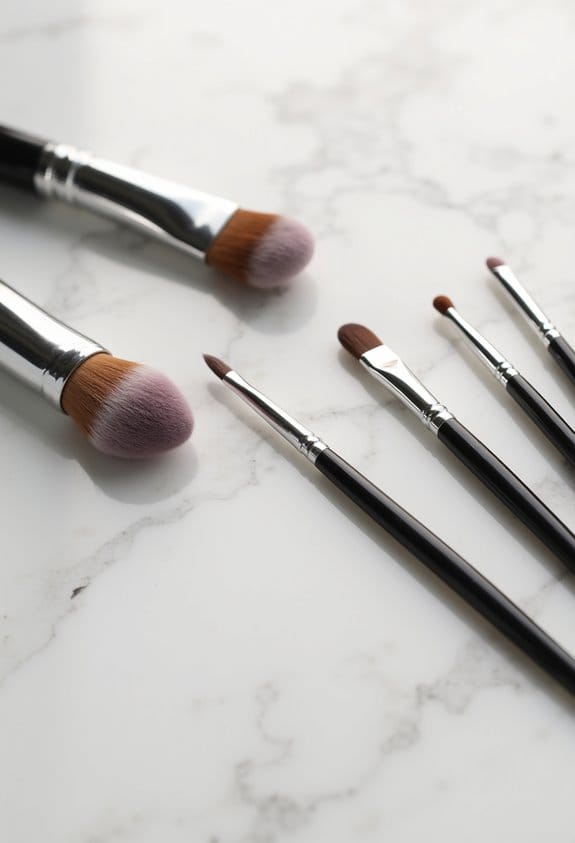
When it comes to eye makeup, blending brushes and shader brushes each have their special roles! We use blending brushes for softening edges and merging colors seamlessly. They’re fluffy and dome-shaped, making shifts effortless. On the other hand, shader brushes pack on color precisely, perfect for bold looks! Think of them as the secret agents of your palette! By knowing when to use each, you’ll step up your makeup game big time! Keep going, there’s more to discover!
Key Takeaways
- Blending brushes have fluffy, dome-shaped bristles ideal for merging colors and softening lines, making them perfect for seamless transitions on the eyelids.
- Shader brushes are dense and flat, designed for precise application of color, ideal for packing on pigments and creating bold looks.
- Use blending brushes in circular motions from outer to inner corners to achieve soft, graduated color effects.
- Employ shader brushes with a gentle patting motion for detailed color placement and to enhance vibrancy in specific areas.
- Understanding their distinct functions enhances your makeup application, ensuring you choose the right brush for the desired effect.
Understanding Blending Brushes
Hey there! Let’s chat about blending brushes. These nifty tools come with super soft bristles that are fantastic for making those colors merge together smoothly on your eyelids. They’re especially great for softening any harsh lines, giving you that polished look we all aim for.
When it comes to shapes, you’ve got options like tapered or fluffy. A tapered brush does wonders for precision—perfect for getting into those tricky corners—while a fluffy one is your go-to for sweeping larger areas with ease. For example, if you’re attempting that dreamy smoky eye, a fluffy blending brush helps blend out the darker shades seamlessly with the lighter ones.
Imagine applying a soft brown shade on your lid and then gently blending it out with a fluffy brush until you achieve that gorgeous gradient. It’s all about layering color instead of slapping it on, which makes a world of difference. With the right technique, you can avoid patchy applications and achieve a professional finish right from your own makeup bag. And speaking of looks, let’s move on to some blending techniques that can really elevate your style! Brushes with ergonomic handles also enhance control and comfort during blending, making your application smoother and less tiring.
The Purpose of Shader Brushes

When we want to experiment with darker pigments, precise shader brushes really come in handy! They’re perfect for getting that rich color right into the crease of your eyelid. Just think of it this way: you can use a patting motion to deposit the color exactly where you want it, then follow up with gentle sweeping motions to blend it out seamlessly.
It’s all about that beautiful blended effect. For example, if you’re working with a deep plum or a sultry navy, start by tapping the color in the crease. Once you’ve laid down the base, take a clean shader brush to soften the edges. This technique can elevate your eye look from simple to stunning in no time!
For a flawless finish and eye safety, consider using tools with ergonomic handles that provide better control during application.
Key Differences Between Blending and Shader Brushes

Hey there! So, if you’re looking to master that perfect eye look, getting a handle on the differences between blending brushes and shader brushes is essential. Think of them as your trusty paintbrushes in a makeup artist’s toolkit. Each one has its own special job that makes all the difference in your final look!
Let’s start with blending brushes. These guys have fluffy, dome-shaped bristles that are just perfect for softening those harsh lines on your eyelids. They’re great for blending multiple eyeshadow colors together seamlessly. For instance, if you’re working with a light transition color and want to merge it into a deeper shade, a blending brush will help you achieve that smooth gradient.
On the flip side, we have shader brushes. These brushes are dense and usually flat or angled, which makes them fantastic for packing on color. If you want to create a bold, vibrant look, this is your go-to brush! Say you’re applying a stunning metallic shade right onto your eyelids—using a shader brush will help you get that color on precisely without any mess. Choosing brushes with high-density synthetic fibers can also improve color payoff and blending precision for both blending and shader brushes.
Techniques for Using Blending Brushes
Hey there! So, have you ever wanted to nail that perfect blended eyeshadow look? It can be tricky, but once you get the hang of using blending brushes, it’s a game changer! To create a soft smoky eye, grab a fluffy blending brush and start making gentle circular motions from the outer corner of your eye to the inner lid. This technique helps blend the colors seamlessly, giving that gorgeous gradient effect.
When you’re working with darker shades in the crease, remember to build up the color slowly. You don’t want any harsh lines ruining your masterpiece! For example, you could start with a light brown and then slowly add in a deeper chocolate to add dimension. And trust me on this—cleaning your blending brushes regularly is a must! A fresh brush ensures that colors apply evenly, avoiding that clumpy shadow look. Using synthetic bristles brushes can also help make blending easier and cleaning quicker for more beautiful results.
Techniques for Using Shader Brushes
So, now that we’ve got blending down to a science, let’s chat about shader brushes. These brushes are fantastic for packing on color with ease! I love starting with a flat shader brush; it really makes applying eyeshadow a breeze. Just use a gentle patting motion to apply your chosen shade from the inner corner all the way to the outer corner. This technique helps to avoid any fallout, so your eye look stays vibrant and clean.
When it comes to creating smoky eyes, a precise shader brush is key! You can form that beautiful V-shape in the outer corners by alternating between patting and sweeping motions. For an added touch of definition, the angled shader brush is a must. It works wonders to accentuate the socket line and adds color just above the crease—try it just above the tear duct and lift at the outer corner for a lifted look. Overall, shader brushes are your best friends for making your eyes stand out and look stunning.
Now that we’ve got shader brushes down, let’s explore some techniques for blending them seamlessly into your overall eye look! Keep in mind that brushes made with synthetic bristles are not only smooth in application but also easier to clean, making them an excellent choice for ongoing use.
Choosing the Right Brush for Your Eye Look
Hey there! So, let’s talk about blending brushes. They’re basically your best friend when it comes to achieving that seamless look for your eyes. These brushes have dome-shaped bristles that work wonders in softening harsh lines, making sure your eye makeup transitions smoothly from one shade to another. If you’ve ever struggled to get that perfect gradient, blending brushes are the key!
Now, on to shader brushes. These guys come in a variety of shapes and sizes, each serving its own purpose. If you want to pack on color on your eyelid, a flat shader brush is your go-to. It allows for precise application, giving you that bold intensity that really makes your eyes pop. For example, if you’re working with a glittery shade, a shader brush helps you apply it evenly and with great impact.
So, here’s a little tip: Start with your flat shader brush for that vibrant lid color, then grab a blending brush to softly buff the edges. This two-step approach will leave you with a stunning, professional look every time. Plus, if you’re using synthetic bristles, they can help you achieve a smooth finish without much fuss—unless you’re going for a dramatic smoky eye, of course!
To keep your tools in top shape and ensure the best application, consider user comfort and device care as you would with beauty devices.
Ready to explore the next category of brushes? Let’s look at some detail brushes that can help you fine-tune those intricate eye looks!
Tips for Maintaining Your Makeup Brushes
Hey there! You know how a painter treasures their brushes? Well, it’s the same with makeup brushes—they’re essential for creating that perfect look! To keep your makeup brushes in great shape, it’s all about a little TLC.
First up, let’s talk about cleaning. Make it a habit to wash your brushes regularly with a gentle cleanser. Think about it: if you don’t clean after each use, the makeup residue builds up and can make blending a real hassle. Try using baby shampoo or a brush cleaner; just a small amount will do wonders!
When rinsing your brushes, avoid soaking them in water. This can weaken the glue that holds the bristles, leading to shedding. Instead, just run lukewarm water over the bristles, and be careful not to wet the ferrule—the metal part that holds the bristles together.
Once you’ve cleaned them, gently reshape the bristles and lay them flat to dry. This helps maintain their shape and ensures they’ll be ready for your next look. Storing them upright is also key; it keeps them in good condition and protected from sunlight, which can wear them down over time.
Taking care of your brushes is simple, but it makes a big difference in how they perform and last. Plus, you’ll feel more confident knowing your tools are clean and ready to help you achieve that flawless finish! Regular cleaning can also help prevent skin irritation caused by bacterial buildup, keeping your skin healthier while you glam up.
Frequently Asked Questions
What to Use a Blending Brush For?
When we want seamless color shifts in eye makeup, we grab a blending brush. With the right brushing techniques and materials, it softens both cream products and powder formulas, giving our look that perfect finish.
What Is a Shader Brush Used For?
A shader brush is essential for solid color application, utilizing various techniques and types. The best shader brushes are made from quality materials, ensuring longevity. We must maintain them for peak performance in our makeup routines.
What Is a Shading Brush Used For?
A shading brush’s great for precise eyeshadow application using techniques like patting for color intensity. We use it for contouring essentials and suggest detailed tutorials to master different brush types and blending methods effectively.
Is It Better to Blend With a Brush or Sponge?
We think blending with a brush’s durability and texture differences gives smoother results, while sponges absorb too much product. Each tool has its place, but brushes often excel in blending techniques for a polished finish.